
Turn Your Garage Into a Portrait Studio
how i set up my garage studio in 30 minutes (and why a chair changes everything)
sometimes you don't need a fancy studio. sometimes a garage, one light and a bit of knowhow is enough.
everyone has this space
a garage. a basement room. a bedroom where one wall is free. if you have four walls, you have a potential studio.
the most important thing: you don't need much. for portraits, one light is enough. period.

one light is enough ...
sure, you can work with three, four, five lights - fill light, rim light, hair light, background light. but you don't have to. some of the most iconic portraits in history were made with one light. if you understand how light works, one is completely sufficient.
continuous light
i work with a nanlite forza 150 - an led continuous light. why not flash?
with continuous light, i see immediately how the light falls on my subject. no surprises. i see the shadows, the contrasts, the mood in real time.
and here comes the crucial difference to flash: i can react in real time and direct my subject.
the nanlite forza 150
the nanlite forza 150 is just one option among many. it's a 150w led monolight with daylight-balanced 5600k, outputting about 28,000 lux at one meter with decent color accuracy (cri 96, tlci 98). compact, lightweight at around 1.4kg, runs on ac power or optional v-mount batteries. but honestly?

nanlite forza 150
similar lights exist from other brands at comparable specs. godox makes the vl150 and the newer litemons le200bi and le300bi. aputure has the amaran 150c and 200x series, and the ls c120d ii. all in the 150-200w range, all daylight or bi-color options, all with bowens mount compatibility. pick what fits your budget and availability. they all do the job for a garage studio.
the sun moves
i come from outdoor photography. outside, i can't move the light. the sun is where it is. so i move myself and my subject to the light. i look where the light falls beautifully, position my subject there, and then i give instructions: "turn your head a bit to the right", "chin slightly up", "bend your knees a bit so i get that nice catchlight in your eyes".
in the studio i do the same. my light stands where it stands. i usually don't change the position at all, unless i want a completely different mood. instead, i work with my subject - hand signals, instructions, small corrections.
"turn your head a bit more towards the light", "tilt it slightly down", "relax your shoulders".
i see immediately how the face changes when the subject moves their head just two centimeters. and i can react directly, without having to take a photo first, look at the screen and then say "ok, again, but different".
with flash you'd have to trigger, check, correct, trigger again. with continuous light you work live.
the downside? continuous light is usually weaker than flash. but for indoor portraits in a small room completely sufficient.
the smallrig ra-d85
the smallrig ra-d85 is interesting because it's a parabolic softbox that you can use in multiple ways. with both diffusers attached, it's a classic softbox giving you soft, even light.
remove one or both diffusers, and you get more output - harder, more direct light with increased intensity. it's not quite a beauty dish (those have a specific reflector plate that creates different light quality and eats more light), but it gives you flexibility.

smallrig ra-d85 versatile and affordable
85cm diameter, relatively affordable, and it comes with a honeycomb grid for even more control.
bowens mount
the key feature: bowens mount. this is the industry-standard bayonet mount - a three-prong twist-lock system with about 110mm diameter. the massive advantage? universal compatibility. you can use bowens mount modifiers with lights from nanlite, godox, aputure, smallrig, and dozens of other brands. it's the closest thing to a universal standard in studio lighting.

nanlite bowens adapter
the nanlite forza 150 includes a bowens adapter, and here's why that matters: the adapter mounts directly to your light stand, taking the weight of the modifier. without it, mounting the relatively heavy smallrig softbox directly onto the small nanlite body would stress the light's native fm mount over time. the bowens adapter solves this - it's sturdy, distributes weight properly, and gives you access to an enormous ecosystem of affordable light modifiers.
what you can do with one light
one light doesn't mean "one possibility". it means infinite possibilities, depending on where you place it.
rembrandt lighting: light 45 degrees to the side and slightly above eye level. recognizable by the small triangle of light under the eye on the shadow side. classic, dramatic, timeless.
loop lighting: light a bit less to the side, the shadow of the nose points slightly down to the side. very flattering.
split lighting: light directly from the side. one half of the face in light, the other in shadow. extremely dramatic.
broad vs. short lighting: depending on whether the side of the face facing the light or facing away shows to the camera, you can make the face appear wider or narrower.
you can position your subject further away from the background so the background falls into complete darkness. or closer, so the background still catches some light.
with a single light you can make portraits ranging from "bright and airy" to "completely dark and moody".
managing shadows
the biggest mistake: unwanted shadows. on the background. under the nose. under the chin.
here's what you need to watch for:
- distance to background: the further your subject is from the background, the fewer shadows you cast on the background. i try to keep at least one meter distance.
- light height: too high = harsh shadows under nose and chin. too low = weird, lit-from-below horror look. eye level to slightly above is usually the sweet spot.
- light distance: too far away = less control, more spill on the background. too close = possible hot spots. experiment.
when you move your light, walk around your subject multiple times and look at where shadows appear. take test shots. understand the light.
camera: tripod or handheld?
both work, both have advantages.
during the shoot with luisa i used two setups in parallel: my hasselblad x2d ii 100c on a tripod with a fixed lens, and my sony a1 mark ii handheld with the awesome 50-150mm f/2.
tripod: consistency. every image has the same framing, the same perspective. good when you want to make a series that fits together. also: you can focus more on your subject instead of looking through the viewfinder.
handheld: flexibility. you can quickly change the angle, walk around your subject, go closer, go further. more dynamic, more experimental.
both approaches have their place. with luisa i ended up with images from both cameras - and i'm curious if you can tell which camera made which image of luisa.
spoiler: it's harder to guess than you think.
the background (or: not everything has to be perfect)
my background is an amazon setup that i half regret. two wobbly stands, a plastic connection piece, a few oversized clothespins and a black cloth that unfortunately reflects quite strongly.

clothespins

the whole setup
is it ideal? no. does it work? yes.
if you don't have budget for expensive background systems: buy a simple black or grey cloth, hang it up however you can. a black background forgives the most - shadows disappear, and if you position your subject far enough away, the background becomes complete darkness anyway.
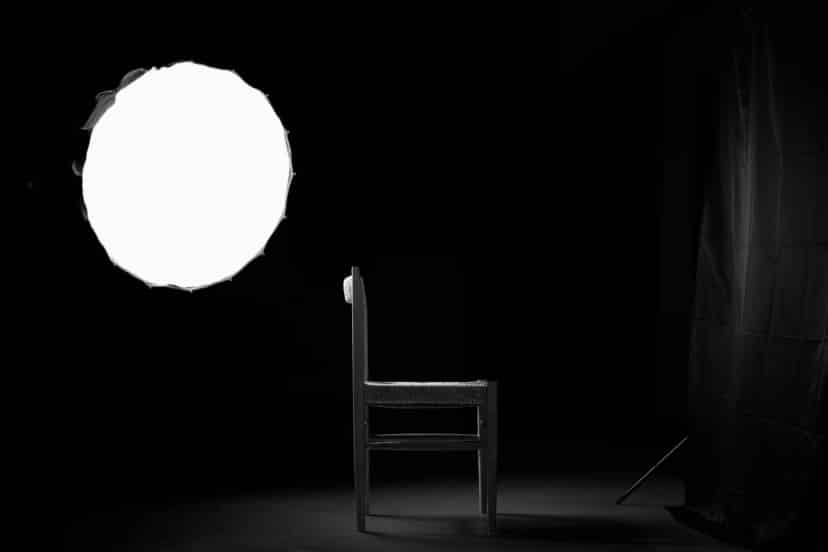
the game changer: the chair
now comes the most important part of the whole setup - and it's not a light, not a camera, not a softbox. it's a damn chair.
why? people i photograph feel uncomfortable when they're just supposed to stand in front of a background. they don't know how to stand. their arms feel weird. everything looks stiff.

the chair
with a chair everything changes:
- your subject sits lower - even my small background cloth is more than enough
- countless variations: sitting on the front edge, casually leaned back, leaning forward, turned sideways, over the backrest
- there's something to interact with - hands on the armrest, arm over the backrest, feet positioned differently
- people simply relax more. a chair gives support, structure, security
with luisa this worked perfectly. we could go through different poses and moods in a short time without it feeling forced.
practice before it gets serious
before i photographed luisa, i practiced. with myself.

me
i set up my light, put the camera on a tripod, used my camera's remote control app and photographed myself. over and over again.
i was never one of those selfie guys. but i started enjoying this. because you have so many creative options where you immediately see the results. move the light, change the angle, adjust your position - instant feedback. no waiting, no explaining to someone else what you want. just you, the light, and the camera. it's actually fun.

me, too ;)
light from the left. light from the right. higher. lower. closer. further away.

me, again
it feels a bit silly, but it's the best practice. you learn how light falls on a face - and your own face is always available. you see immediately which angles work, which shadows appear, what's flattering and what's not.
and when someone sits in front of your camera, you already know beforehand where the light needs to go.
the results
so, here are the portraits i shot of luisa. with exactly this setup. garage, one light, cheap background, chair.
honestly? would you have guessed these were shot in a garage with budget gear?


conclusion
you don't need thousands of euros in equipment. you need a garage or a room with a free wall. one light. a softbox. a chair. that's enough.
understand your light. experiment. practice. and give your subject a chair.
does it work? yes. is it perfect? no. but that's not the point.
Comments (2)
Je suis Phil74 sur Glass,je te suis et apprécie énormément ton travail,j'ai envie de faire du portrait et cet article me redonne confiance pour attaquer simplement et sereinement,j'ai du matos mais pas la technique,merci pour tes précieux conseils accessibles et enrichissants !
Merci beaucoup Phil74, ça me fait vraiment plaisir de lire ton message ! C'est exactement pour des retours comme le tien que je prends le temps de partager mes expériences. Le fait que tu aies déjà le matos, c'est super — mais honnêtement, la technique vient assez vite dès qu'on commence à pratiquer. Le plus important, c'est d'oser se lancer, et apparemment t'es prêt pour ça. N'hésite pas à me montrer tes premiers essais, je serai curieux de voir ce que tu fais. Bon courage et surtout amuse-toi bien !
Leave a comment
More Posts
OMR Birthday Portraits: On-Site Pop-Up Studio
Portrait pop-up studio photography at the OMR birthday event: authentic on-site portraits, atmosphere, and moments from the celebration.
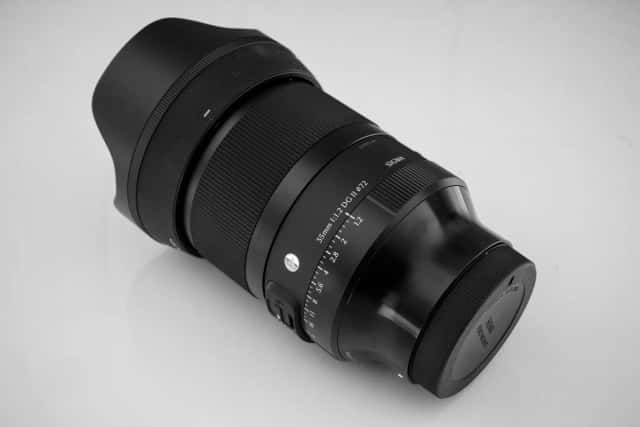
first day with the sigma 35 f/1.2 art ii
yes, he did it again. i had to buy it. and went directly on the street. read my first impressions here … ...